
This tutorial provides step-by-step instructions to build BALANC3R, a self-balancing LEGO MINDSTORMS EV3 robot.
Requirements
- 1x LEGO MINDSTORMS EV3 #31313 Home Edition. (If you have the LEGO MINDSTORMS EV3 Education Core set #45544, you can build Gyro Boy instead.)

- 1x Gyroscopic Sensor. Use one of the following sensors:
- EV3 Gyro by LEGO (pictured below)
- NXT Gyroscope by HiTechnic
- Both sensors work great in this project, but here are some considerations before you buy:
- The EV3 Gyro is cheaper. It can measure the angular rate and estimate the accumulated angle. The accumulated angle is not used in this project, but it may be helpful for other projects, such as making accurate turns.
- The HiTechnic Gyro is more accurate for this application because of the increased resolution. It can only measure angular rate.

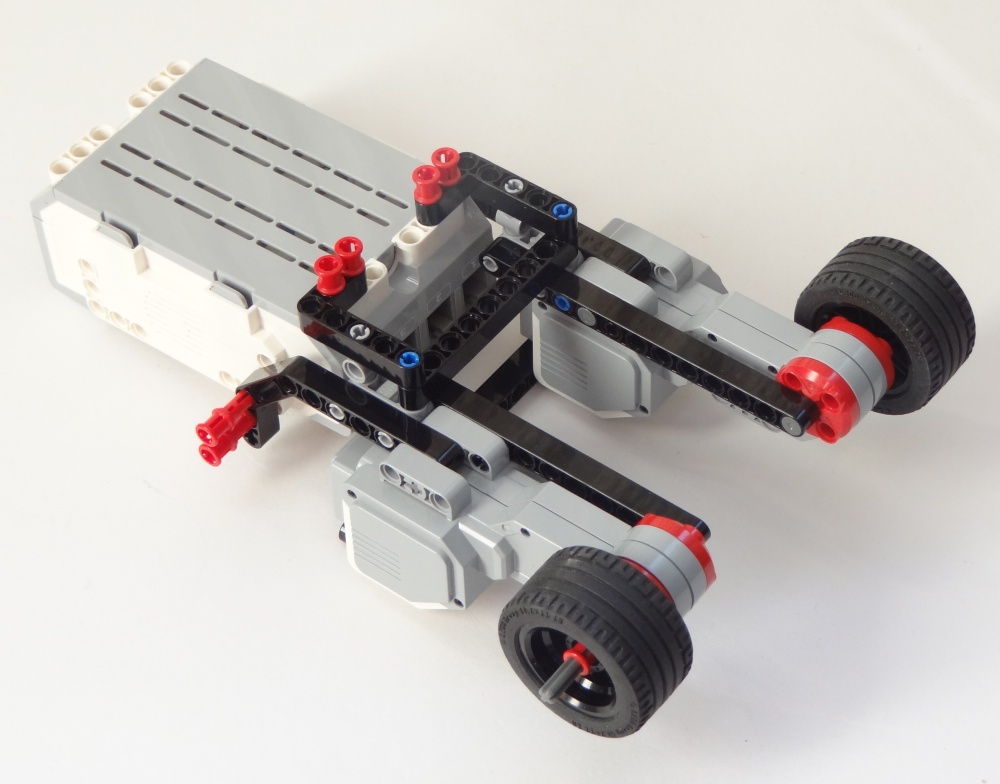
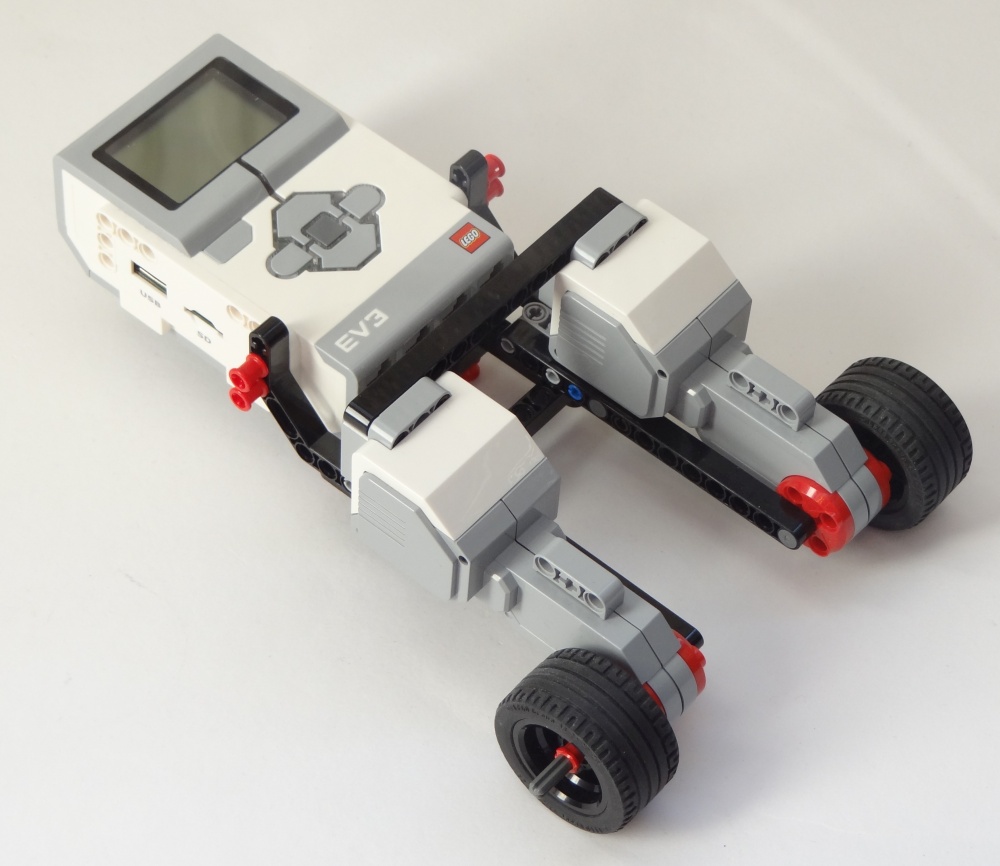
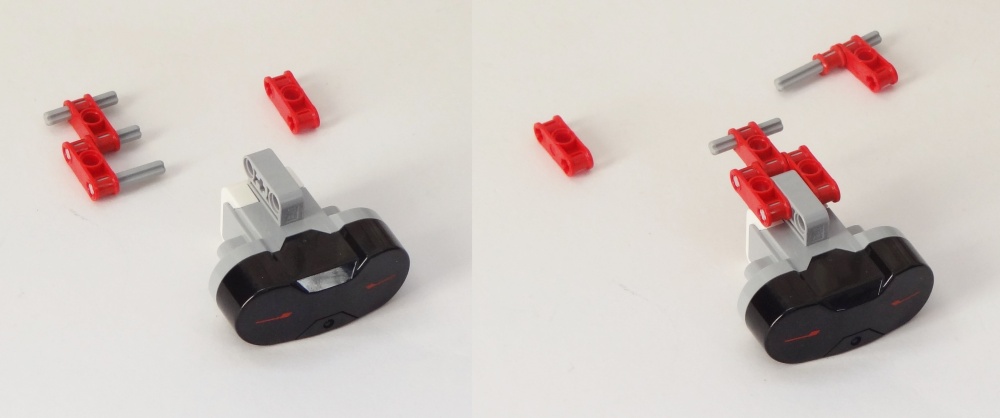
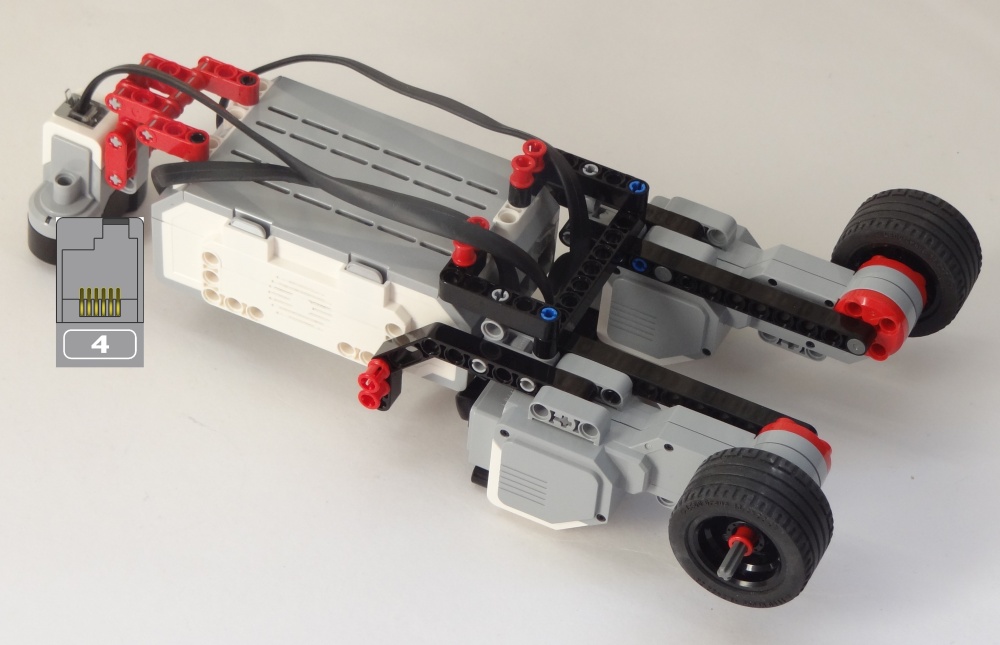
Building Steps
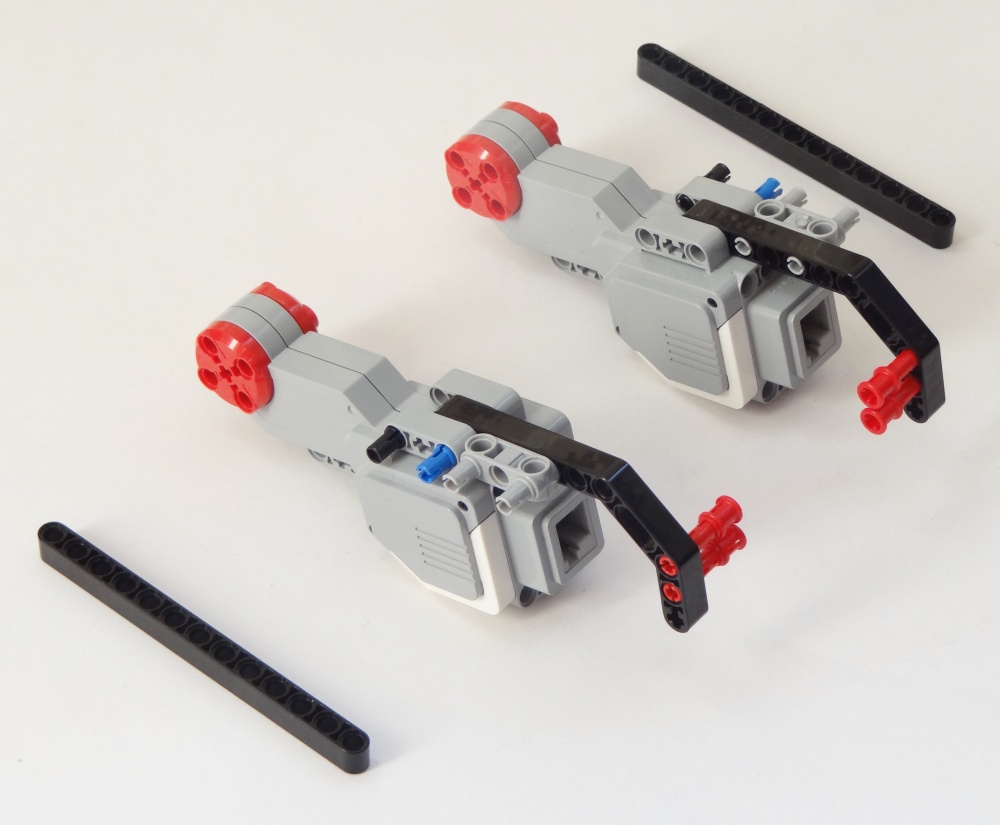
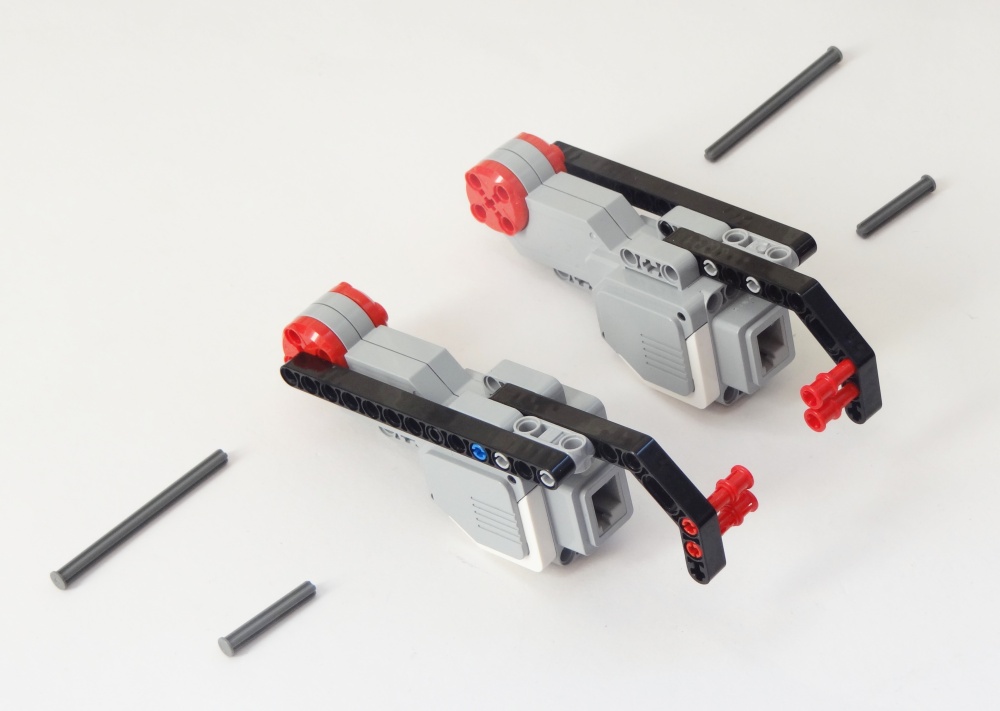
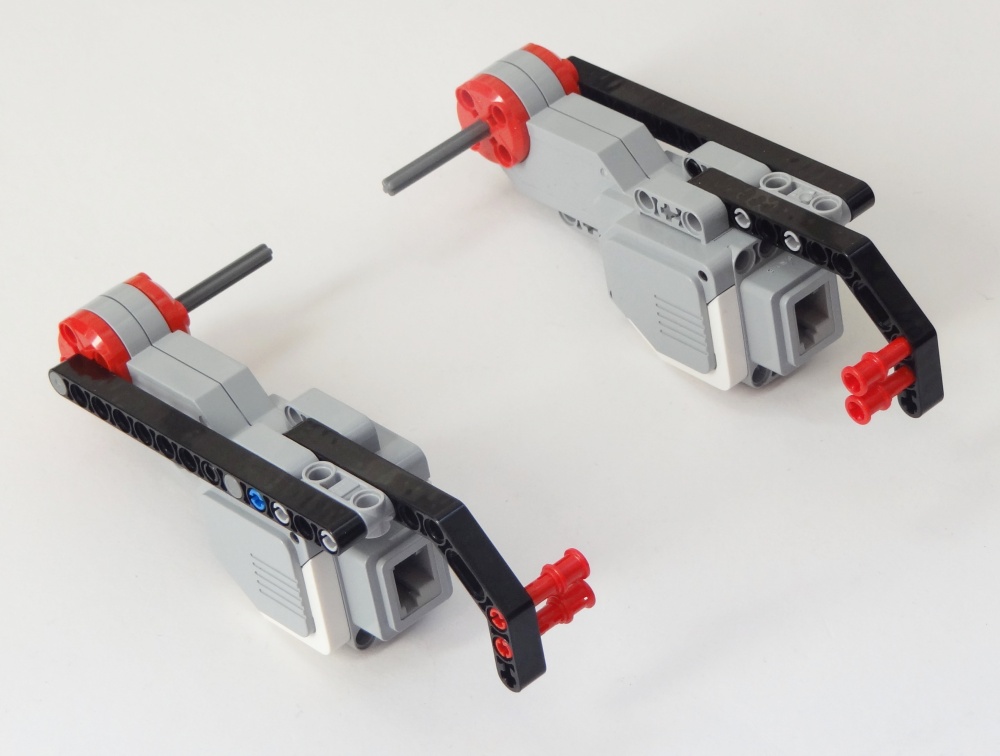
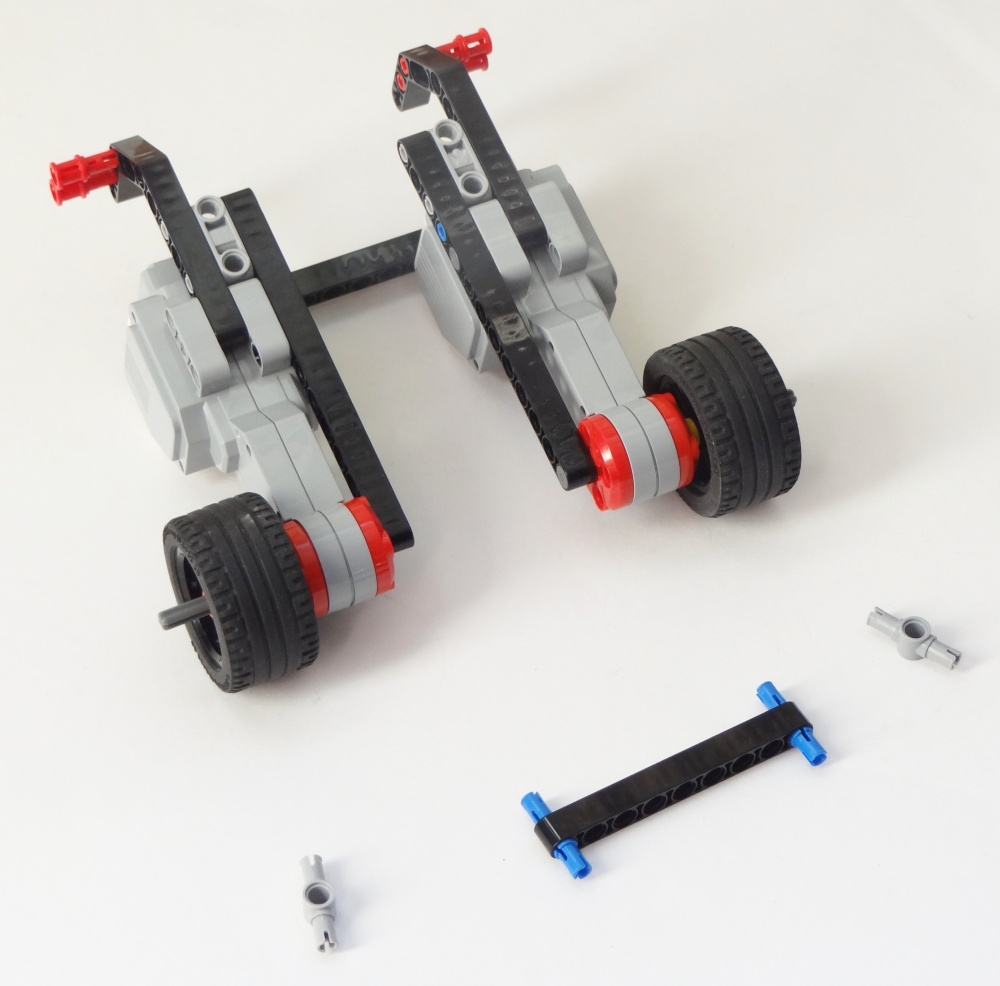
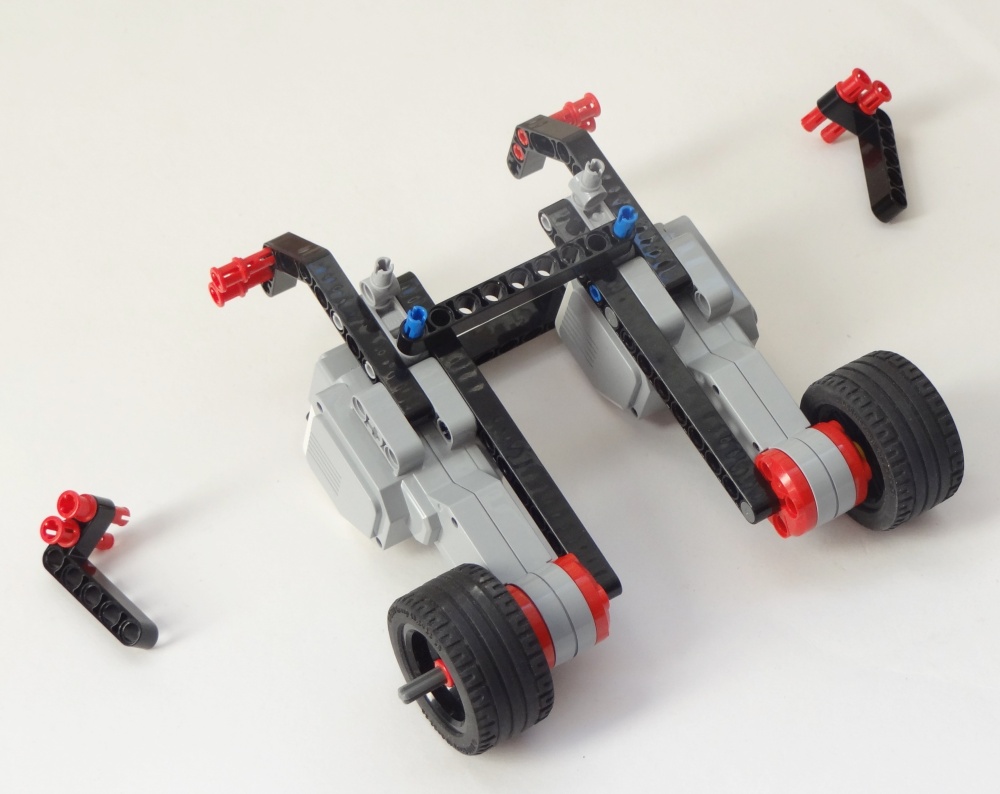
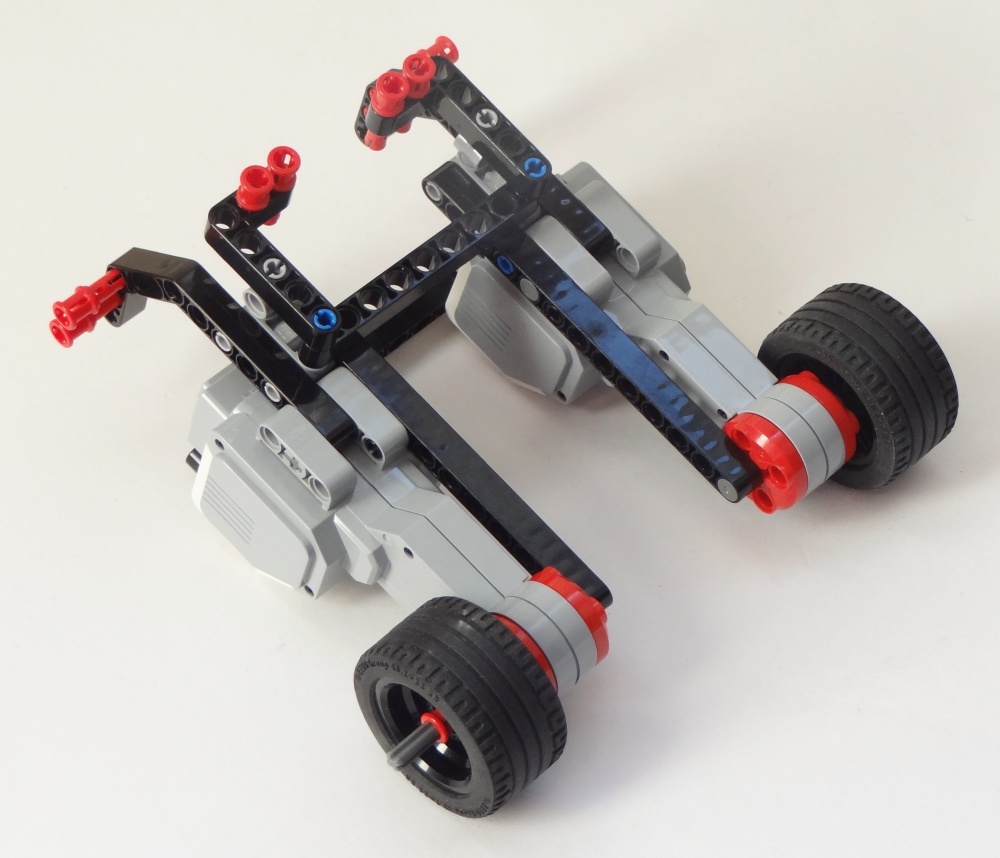
Build the robot by following the steps in order. Click on the pictures for a bigger image. Be sure to connect the motors and sensors to appropriate port on the EV3 brick as indicated by the port icons.
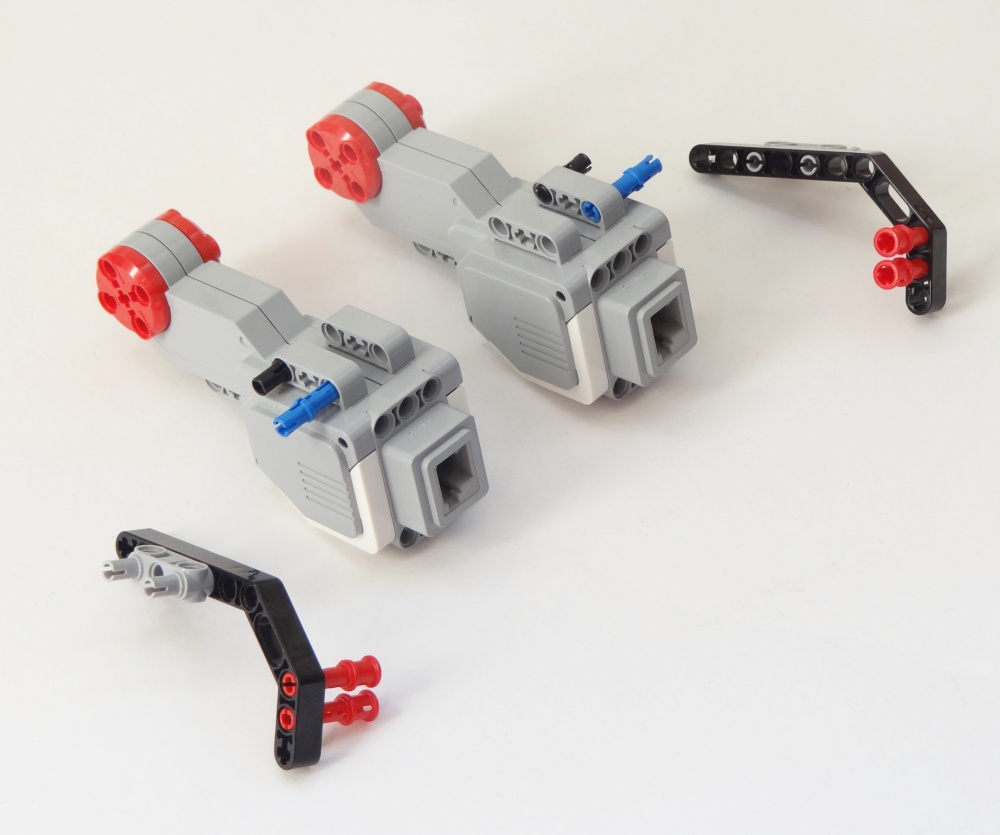


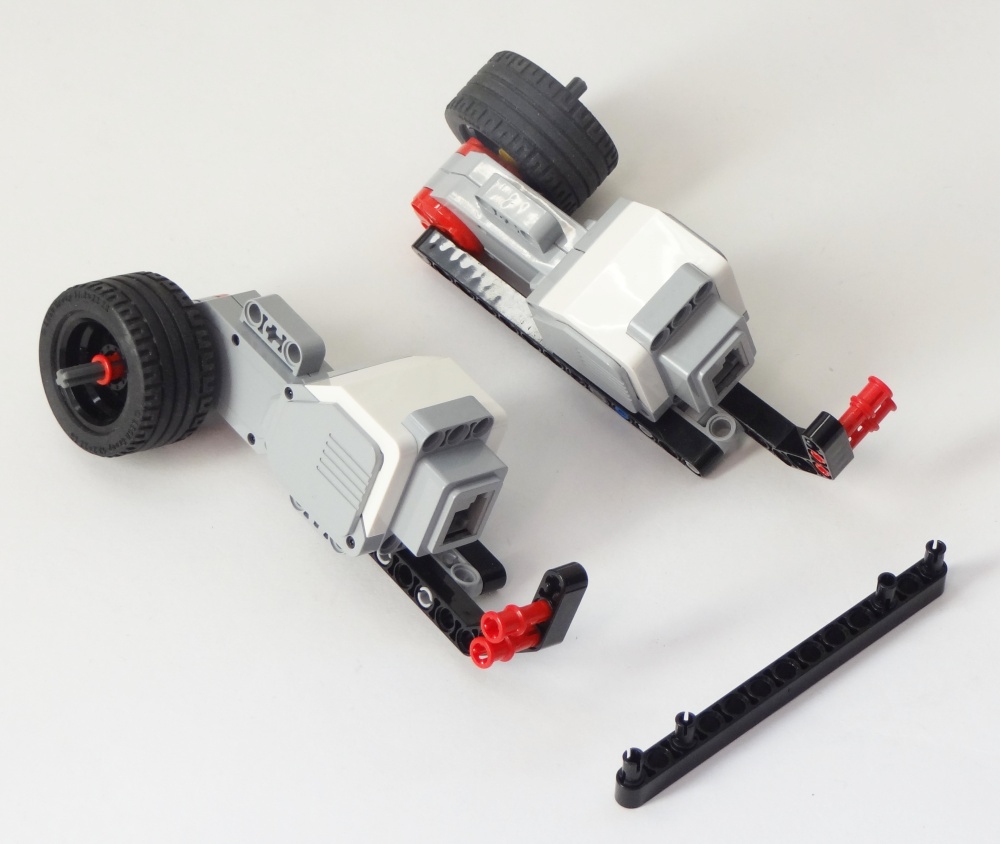

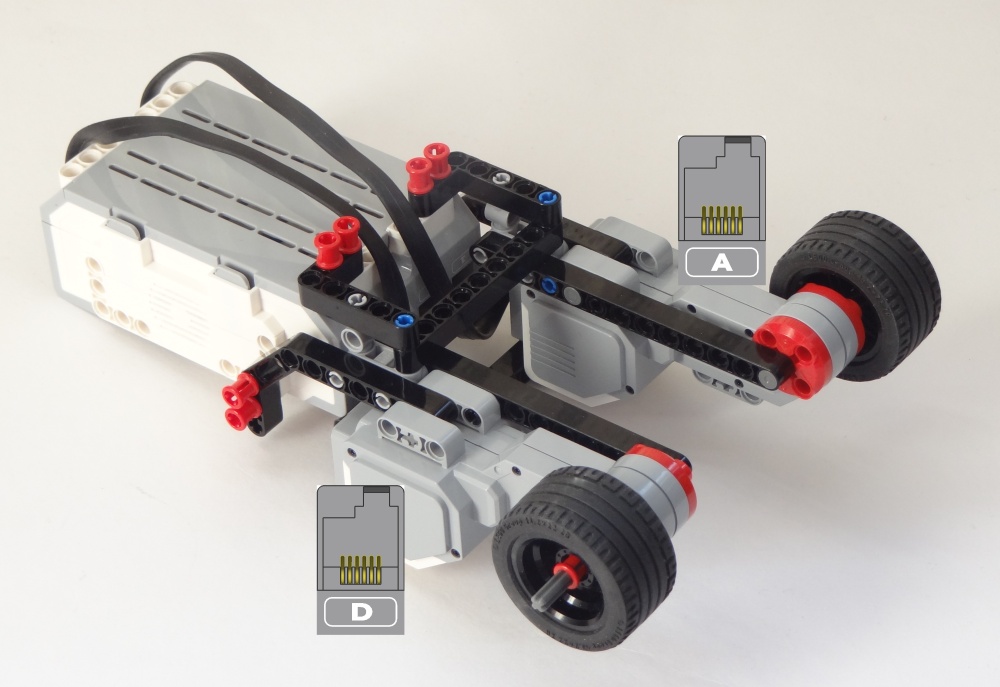
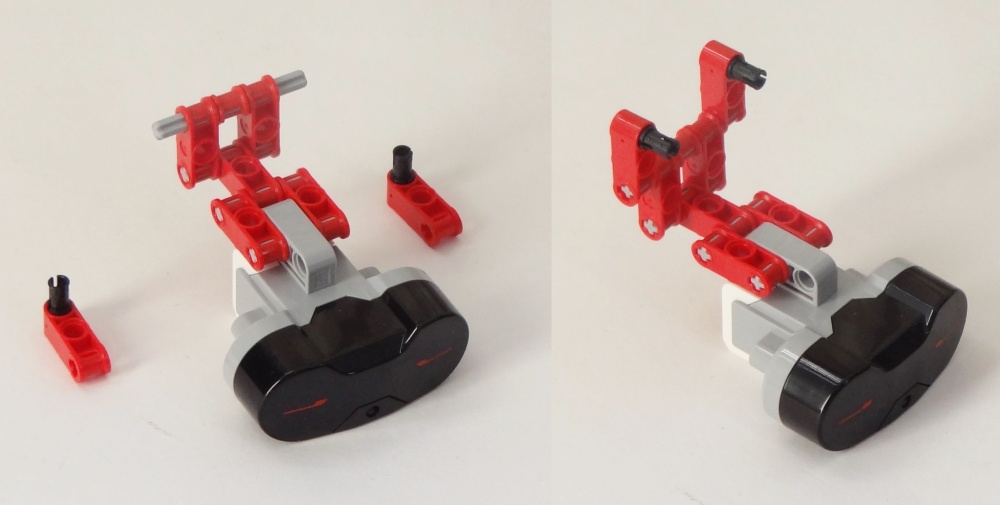
The following two steps are for the LEGO MINDSTORMS EV3 Gyroscopic sensor only. Skip these steps if you have another sensor.
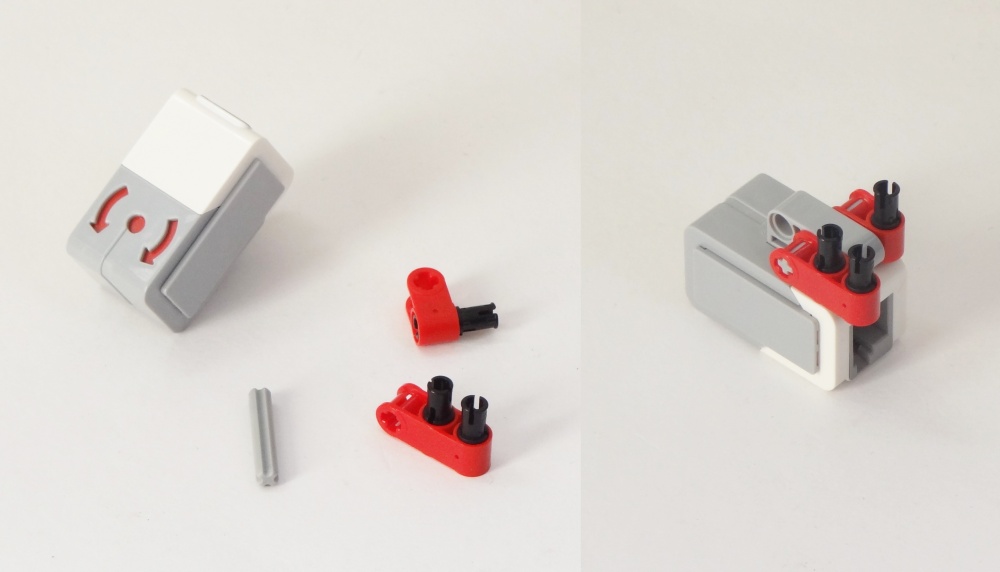
Attach the LEGO MINDSTORMS EV3 Gyro sensor as follows. Be sure to connect it to the side of the EV3 brick with the USB port.

The following two steps are for the HiTechnic Gyroscopic sensor only. Skip these steps if you have another sensor.
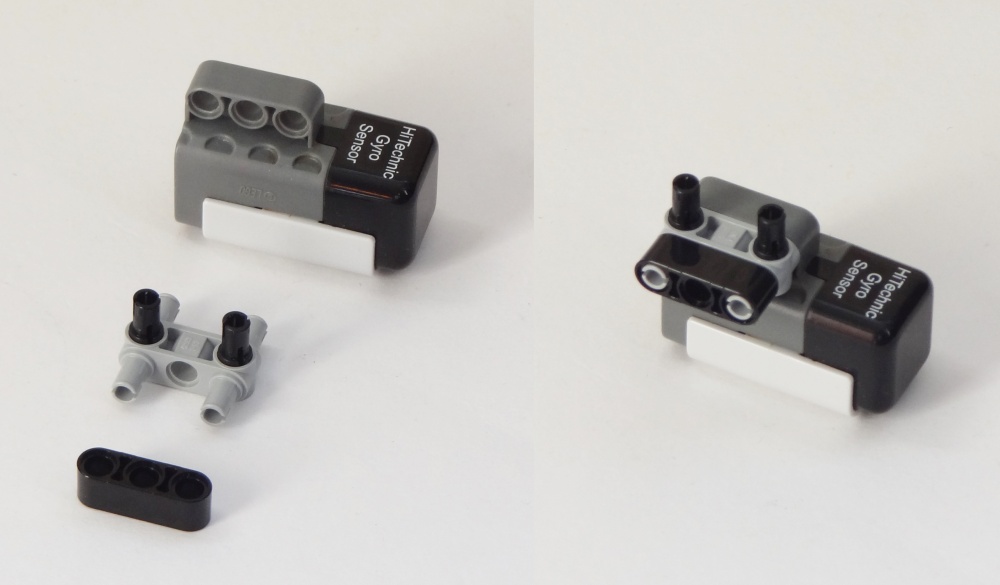 Attach the HiTechnic Gyro sensor as follows. Be sure to connect it to the side of the EV3 brick with the speaker.

Programming
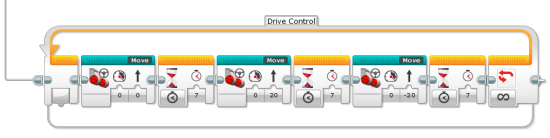
Now that you’ve finished building your robot, you’re ready to program it. See this article for instructions.

Great project Laurens. Looking forward to the code next week.
Nice!Really looking forward to the program. I’ve been trying to wrap my head around the “segway”-programming for some time. Always ending up with my robot falling flat with both wheels full throttle in random directions:) Please tell me there will be an step by step tutorial for the programming as well! I’m dying to get it all explained to me! You are doning a great job! Thanx /Tomas
Just finished building your Formula EV3 Race Car. Enjoyable project. I plan on having a programming joy using RobotC. But yet, the remote control program is keeping me busy driving the car.
In the meantime, I having been looking at your BalancE3 robot. I will have to use my NXT motors instead of the EV3 motors. It will be interesting to see if your program will work with no problem.
Hi Ronald,
Great to hear that robot was fun to build. Maybe after you’ve tried the BALANC3R project, you can make the Formula EV3 Race car balance on its two rear wheels, and continue controlling it with the remote 😀 (It’s one of the challenges at the end of the balancing tutorial)
The NXT motors are indeed quite comparable. Actually, I find them to be slightly more precise because they seem to have less backlash, which is good for balancing.
When rotating in place, you’ll notice that BALANC3R balances almost perfectly, while it moves back and forth while trying to stand still. That’s because when standing still, it constantly moves back and forth across the backlash. While turning, it’s always on one side of the backlash.
Laurens
I’m C Ronado!
Can you use the dexter industries gyroscope sensor for the balanc3r?
Unfortunately, not at this time. I was going to add support fot it, but their sensor block didn’t work, or wasn’t fast enough.
Hello,guys! Valk,Can you add a sound sensor?
Hello Laurens,
I’m sorry that I posted this comment here but it wouldn’t work on the other page. I bought your book on my kindle but I saw the BRICK SORT3R so I put in the password in figure 15-9 and it didn’t do anything when I submitted it just looked liked it refreshed the page. Am I doing any thing wrong?
sorry for posting on this page it was one of the pages that didn’t have passwords on it,
B-D
I think $180 is a bit too steep for a recolored NXT. It would be cool if LEGO could make falceeatps in different colors that you could swap out (A clear one to display the internals would be awesome!)
Hello Laurens,
Great site and book. I will order that. I am taking and advanced Robotics course this fall and we will be using EV3. But a lot of advanced programming will be in leJOS. Do you have a book recommendation for leJOS programming?
Thank you and keep up the great work.
Best wishes
Laurens,
I have used and enjoyed your EV3 book very much.
The Balanc3r ‘bot is fantastic!
I added an Arduino UNO, Emic2 text to speech module, EasyVR voice recognition module, Bluetooth module, Pixy CMUcam5 video camera, and a FrSky RC receiver to my Balanc3r ‘bot that I call Wilber.
He is to have 5 modes of control and speech:
1) IR control using the EV3 Beacon
2) Voice recognition control
3) Bluetooth-cell phone App. 1
4) Bluetooth
5) RC control
6) Video control
The basic idea is to convert all the control sources to ‘speed’ and ‘steering’ values.
I was able to get each control mode working on a breadboard but have not combined them. The IR control and RC control are working now.
I used Dexter Industries I2C block to communicate between the EV3 and the Arduino.
Here is a short movie of Wilber under IR control.
https://www.youtube.com/watch?v=DiGyeV759JE
Again, thanks for creating such a great platform!
Irv Stafford
Hi Irv,
Thanks a lot for your comment. Sorry I didn’t see it before—I have to manually review any comment with a URL in it to reduce spam.
Glad to hear you liked the book. The extended Segway project with sound is impressive, nice work!
Best,
Laurens
hi, i have the gyro from mindsensors http://www.mindsensors.com/index.php?module=pagemaster&PAGE_user_op=view_page&PAGE_id=158
can you give me any pointers on how to use this sensor in your program please.?
thanks in advance.
mike
Can you post the programing using absolute-IMU?
Of course!
I can’t!
Hey Laurens,
I have buildet jour balancer and i have building a line follower from that, i can give jou the instructions and the ev3 programm, THATS REALY WORK!
Good job 🙂
Hey laurens peter here!
I need a challange to build an robot, why an DUCKS3GWAY or a realy fast car
Or… Can jou reply and write it?ok. HAPPY HALLOWEEN!!!!
Laurens hello do you reply??
You Fokin Wot M8 1v1 Butta crumpett Wot Amayzing Speqtackula Penus You Wot
Laurens,
Enjoying your excellent book received as Xmas gift.
Have you published any new build instructions as I’ve completed just about everything out there, but just not creative on my own at 78, ha.
Hi Aubrey,
Thanks for your feedback!
You can also build all 12 bonus projects in the LEGO software under the “more robots” tab. I designed the RAC3 Truck.
And then there are the 150+ challenges in my book 🙂
Best,
Laurens
ha gaaaaayyyyyyyyyy
ha gggggggggggggaaaaaaaaaaaaaaaaaaaaaaaaaaayyyyyyyyyyyyyyyyyyyyyy
my robot doesn’t move. any help?
Thanks
hcdbc xhzcchadwet qyfehw4brsdncxfgwq7asufhbcewuysr you are duhhhhhhhhhhh and bluuuuhhhhhhhhhh code for…………..
Dude my robot ain’t no moving please how can it work
really congratulations for this wonderful project
I would like to operate under Lejos
Is there a java version of this program?
Thank you for your response
Hi Laurens! thanks for sharing your designs! We have a EV3 #31313 Home Edition and just got the Educational Core and Expansion sets! Do you have any ideas on how to combine the three of them to build a BIG robot?? Thanks!!
El mio funciono de maravilla!!! Gracias, muy buen aporte para estudiar el programa.
VBDCC
I have a EV3 kit and I have already built my two wheeled robot.. now i have been asked to program the robot using c language !
Hi Laurens can you please help me my balenc3r does not work. It keeps spinning the wheels randomly.
I had same issue at fist. My son would start it and the robot would spin out and get ERROR. I found I needed to do a lot of trial and error finding the balance point before starting program. if it was slightly off balance, I would get the ERROR. Stick with it and really concentrate on keeping it balanced before pressing start. And hold the robot as lightly as possible. Sometimes having two people helps. One person lightly balances the robot using two hands, and when they find the balance point they tell the other person to press start. that often helped us. Also be sure the cables are all plugged into the proper ports. just a few things that worked for me.
hope that helps.
como??????????????????????…
la gravedad?
Ok, so far very cool program. I built the Balanc3r. I can get it to balance in place, however when I run Balanc3r Remote Control, it does not move. I have my remote selected to position 1, as in the program, and I click all the buttons but no response from the robot.
Any ideas, tips, suggestions??
Nevermind…the instructions showed plugging infrared sensor into port 4, but the program showed port 3 for the remote control. I switched the cable into port 3 and it worked perfectly! Thanks!!
Also, as a tip, I found I needed to do a lot of trial and error finding the balance point before starting program. if it was slightly off balance, I would get the ERROR. Stick with it and really concentrate on keeping it balanced before pressing start. And hold the robot as lightly as possible… just a few things that worked for me.
I had same issue at fist. My son would start it and the robot would spin out and get ERROR. I found I needed to do a lot of trial and error finding the balance point before starting program. if it was slightly off balance, I would get the ERROR. Stick with it and really concentrate on keeping it balanced before pressing start. And hold the robot as lightly as possible. Sometimes having two people helps. One person lightly balances the robot using two hands, and when they find the balance point they tell the other person to press start. that often helped us. Also be sure the cables are all plugged into the proper ports. just a few things that worked for me.
hope that helps.
Hey, guys. My BALANC3R is not working. I tried Cadan’s troubleshooting tips, but it still did not work. I reset the gyro sensor and even checked that everything was done correctly. My robot is still not balancing. Whenever it tries to move it falls down in the IR sensor and tries to move around like that.
Please help me resolve this issue.
Hi Lauren,
Great project. Thank you for all instructions. Everything is working fine as long the robot is “balancing” before program starts.
I have a question: I replaced remote controlled part with one that follows the beacon. Tried a lot but always robot falls (Beacon following program alone works fine).
Any ideas what might be wrong?
Thank you for your time
Hello!
Great code! I have been spending a bit of time reverse-engineering it!
I am currently trying to code a version of the BALANC3R which is a spin-off from this one.
The point of my code is to be more compact and simpler, only saving the essential components that cause it to balance.
Near the end of the code, there is a “Wait” My Block, and without this My Block, your code functions exactly how my code does currently–it moves in the right direction with a good speed, but where “0” is changes from side to side until it goes out of control.
The “Wait” block has a dt and a wait condition which resets timer 8. Would you mind please explaining what this My Block does, why you chose this particular dt, and where/what timer 8 is, along with any other relevant information?
Thank you so much!
Thank you very very much. It was always my dream to build it 🙂
Every time I run the program, it says ERROR on the screen. Please help
Great job! it works awesome. Thanks.
Nick
My six year old loves this Robot – thanks from Arthur. Here is his presentation – https://www.youtube.com/watch?v=9zIjwRqAi70
Hello Laurens, thank u for your book. I am trying to do something with my new EV3 (is my daughter’s to say the truth). The problem is that after some project of your book (line follower etc…) i’am trying with balance gyroboy. This one is a very hard work for me, although i have now a lot of free time to spend (for the COVID19) i can’t understand the program so much. OK Laurens but what about a video tutorial for this program? (or a book :-). Thank u from Italy
With some small changes, the Python version of Gyro Boy works for BALANC3R. Personally, Python wins over the LabView programming method.
Gyro Boy Pyton code.
https://pybricks.com/ev3-micropython/examples/gyro_boy.html